In this article named “Standard Proctor Compaction Test”, the details and procedures of proctor test are described.
Introduction
For construction of highways, airports, and other structures, it is often necessary to compact soil to improve its strength. Proctor (1933) developed a laboratory compaction test procedure to determine the maximum dry unit weight of compaction of soils, which can be used for specification of field compaction. This test is referred to as the Standard Proctor Compaction Test. It is based on compaction of soil fraction passing No. 4 U.S. sieve.
Equipment
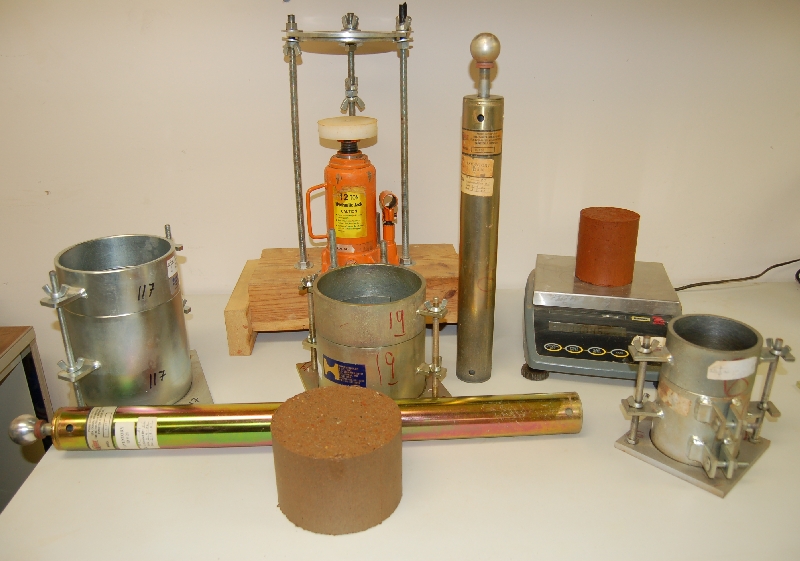
- Compaction mold
- 4 U.S. sieve
- Standard Proctor hammer (5.5 lb)
- Balance sensitive up to 0.01g
- Balance sensitive up to 0.1g
- Large flat pan
- Jack
- Steel straight edge
- Moisture cans
- Drying oven
- Plastic squeeze bottle with water
Proctor Compaction Mold and Hammer:
The Proctor compaction mold and hammer is 4” in diameter and 4.584” in height. The inner volume is 1/30 ft3. The height of fall of the hammer is 12”.
Procedure
- Obtain about 10 lb of air dry soil and break the soil lumps.
- Sieve the soil on a No. 4 U.S. sieve. Collect all the minus 4 sieve materials (about 6 lb) in a large pan.
- Add water to the minus 4 sieve materials and mix thoroughly to bring the moisture content to about 5%.
- Determine the weight of the Proctor Mold + base plate (not extension), W1 (lb).
- Attach the extension to the top of the mold.
- Pour the moist soil in three equal layers. Compact each layer uniformly with the Standard Proctor hammer 25 times before each additional layer of loose soil is poured. At the end of the three-layer compaction, the soil should extend slightly above the top of the rim of the compaction mold.
- Remove the extension carefully.
- Trim excess soil with a straight edge.
- Determine the weight of the Proctor Mold + base plate + compacted moist soil, W2 (lb).
- Remove the base plate from the mold. Extrude the compacted moist soil cylinder using a jack.
- Take a moisture can and determine its mass, W3 (g).
- From the moist soil extruded in step 10, collect a moist sample in a moisture can (step 11) and determine the mass of moist soil + can, W4 (g).
- Place the moisture can with soil in the oven to dry to a constant weight.
- Break the rest of the soil cylinder by hand and mix with leftover moist soil. Add more water and mix to raise moisture content by 2%.
- Repeat steps 6-12. In this process, the weight of the mold + base plate + moist soil (W2) will first increase with the increase in moisture content and then decrease. Continue the test until at least two successive decreased readings are obtained.
- The next day, determine the mass of the moisture cans + soil samples, W5 (g) (from step 13).
Calculation
- Determine weight of the mold W1(step 4).
- Determine weight of the mold + compacted moist soil , W2 (step 9).
- Determine weight of the compacted moist soil = W2–
- Moist unit weight γ = weight of the compacted moist soil / volume of mold = (W2 – W1) / (1/30 ft3).
- Determine mass of moisture can, W3 (step 11).
- Determine mass of moisture can + moist soil, W4 (step 12).
- Determine mass of moisture can + dry soil, W5 (step 16).
- Compaction moisture content , w (%) = (W4 – W5) x 100 / (W5 – W3).
- Dry unit weight γd = γ / (1 + w (%) / 100).